|
A compression sleeve is one way to repair a broken irrigation pipe. Compression sleeves work great in tight spaces, like a hole you dug in the ground. You only need a handful of tools to get this job done. 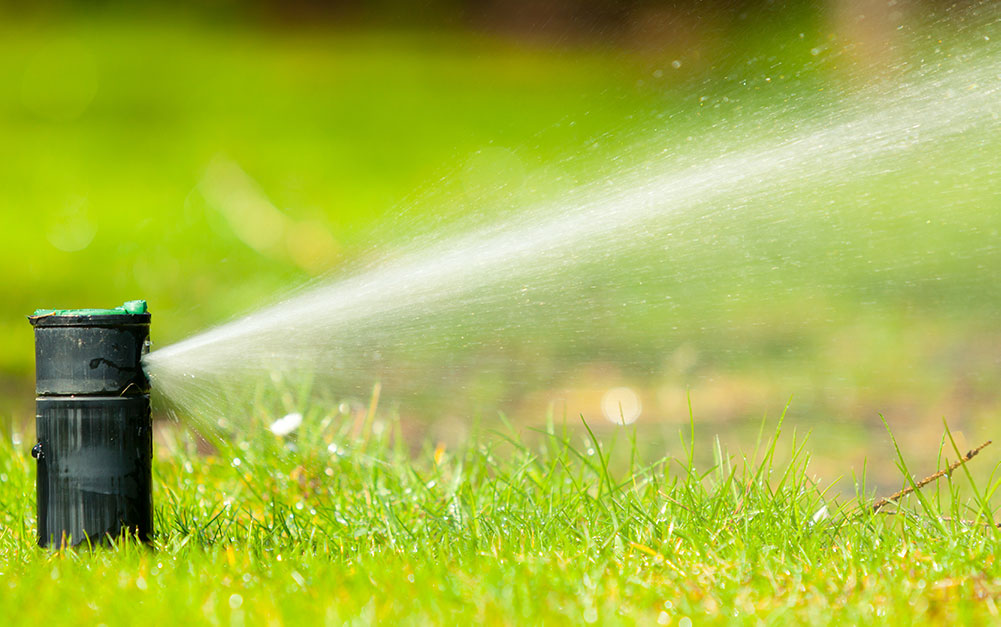 Tools Needed:
Shovel PVC Pipe Cutter or Hacksaw Two Channel Locks Rag (for cleaning) Compression Coupling (or two) small length of pipe (possible) Turn off the water. Dig around and find the break in the pipe. Once you uncover it, excavate about a foot or two along the pipe and about half a foot beneath the pipe. For a small break, you will only need one compression coupling. Cut a one inch section of pipe at the break. Clean the area of the pipe where the compression sleeve will go. For a larger break, you will need two couplings and a small section of pipe. You will cut out a more of the pipe and use the two compression sleeves and the additional pipe to link the irrigation system. If this is your problem, copy the steps below again for the second compression sleeve. Remove the ends of the compression coupling and push them onto both sides of the broken pipe. Make sure the threaded side is pointing toward the opening in the pipe. Push the rubber washers over each side of the pipe. Give yourself a little bit more room than the length of the compression coupling. Now insert one side of the pipe into the compression coupling and then the other. Try to get the break in the pipe to be in the center of the coupling. Hold the coupling in place and slide the washer toward it and the do the same thing for the other washer. Next, lightly twist the nuts onto the compression sleeve. Use one channel lock to hold the compression sleeve and the other to tighten the nuts. BE CAREFUL NOT TO OVER TIGHTEN. If you tighten too much, the compression sleeve will break. Turn on the water and look for leaks. If you spot some leaks, tighten a little more until the leak stops. Back fill the area with dirt and you are done.
8 Comments
It is winter in Baton Rouge which means your grass is dormant and the clover looks very healthy! You may be tempted to let the clover take over so you have a very lush, green lawn. If you want to get rid of the clover without killing your grass, we have your solution. It is also an easy fix. Let's get your lawn clover free. 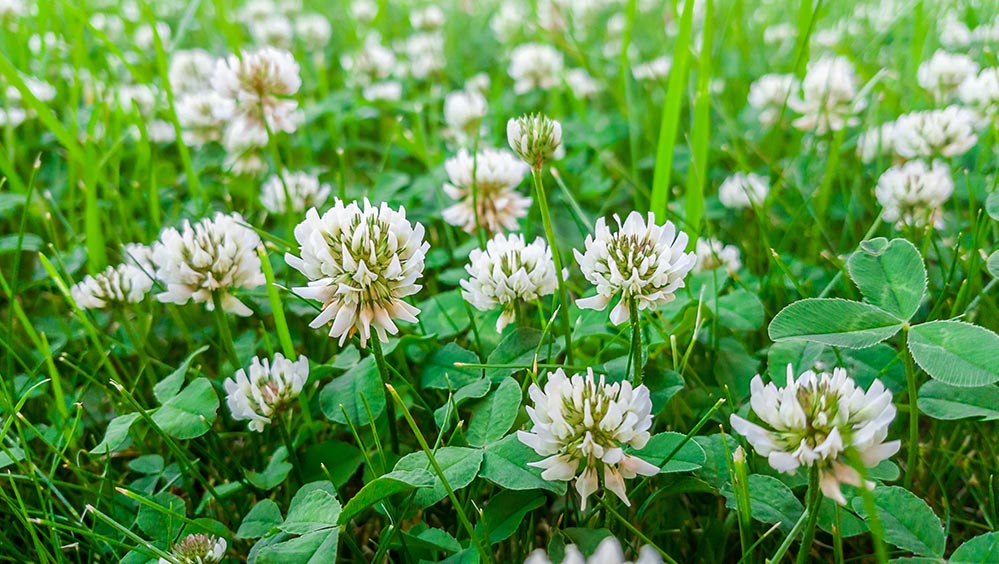 Clover Control
While it matters less when your grass is dormant, you need to know what type of grass you have. Typical desired grass types here are centipede grass, St. Augustine grass, zoysia grass, or bermudagrass. This is important. When you select a selective herbicide at the store, you need to be certain your grass type is listed as a type of grass that the product will not hurt. An old go to active ingredient for clover control is 2,4-d. There are a quite a few other products that will work well to achieve your goal. Follow the label for the product you purchase and spray or spread it over the top of grass. Stop Them Before They Start When dealing with clover, as well as most weeds, you should attempt to stop the clover before it spreads. Regular fertilization with nitrogen during the warm months will encourage your grass to spread and get thicker. Thicker grass will block out the sun from weed seeds. Another solution to stop clover is to use pre-emergent herbicides in late fall to prevent the seeds from ever germinating. Natural Weed Control A natural solution is to use corn gluten meal. Apply twenty pounds of corn gluten meal per thousand feet of clover weeds. After applying the corn gluten meal, water thoroughly and allow to dry. The meal then dries out the clover seeds so that it will continue to spread. Let's start of by setting your expectations. There is no easy way to do this the right way. You will get wet and dirty. It is also going to take some time. First you will need to drain your fountain. You can use your fountain pump to do this by redirecting the hose out of the fountain. Unplug your pump when it starts to take air in with water. Use a wet vacuum to get the remaining water from the bottom. If you do not have an easy to access pump, a bucket will work, but it will take forever.  Next, time to clean. Take our your pump. Clean it in a bucket of warm water with some dish soap. Remove anything big by hand. You will clean your fountain based upon what material it is made. If it is slate, clean it with a soap pad. If it is concrete, use a pressure washer with a fan tip. If you cannot rent a pressure washer, use half a cup of vinegar to one gallon of water and scrub everything. You could use two tablespoons of bleach in a gallon of water instead of the vinegar solution. Be sure to use waterproof gloves if handling bleach. The pump can be cleaned with either the vinegar or bleach solution. Be sure to thoroughly wash your fountain when finished so it is free of cleaning solution.
If there are any cracks, now is a good time to fix them. Let your fountain dry completely. Use caulk and sealant / paint to get your fountain looking like new. Allow it to dry to the time specified on the label. Put your pump back in a fill your clean fountain back up. To avoid doing this for a while, keep your fountain maintained. Using a small fishing net is an easy way to keep leaves and twigs out so they won't dirty up your fountain. Use mosquito pellets to keep mosquitoes from breeding while allowing the water to still be safe for birds or pets. Enjoy your clean fountain!  People worry about weeds in their lawn in the summer, but the best time to inspect your lawn for weeds is in the winter. Grass tends to go dormant in the the winter and turn yellow. Weeds keep their green color and stick out for you to easily spot. Some winter weeds to look out for are white clover, henbit, common chickweed, and annua poa. You should use a selective herbicide labeled for these weeds to take them out easily during the winter. These selective herbicides usually contain atrazine or 2,4-D, but not both. You can use a small amount of product and get rid of the weeds without treating your whole lawn.
You will not see certain summer weeds like crabgrass since they go away for winter since it is an annual weed. If you know you had a problem with crabgrass in the summer, the winter is a great time to apply a pre-emergent herbicide to prevent the seeds left from sprouting during the warm season. You can use a pre-emergent to treat many of the annual weeds you see in the summer that go away in winter. If you remember where they grew, you can treat those areas for better control. Also, do not add any weed and feed for your lawn. Nitrogen promotes growth, and your grass should not be growing. Camellias are an excellent option for most homeowners' landscape in Louisiana. They are resilient plants that bloom through the cool season providing some welcome color between fall and winter. Flowers from each plant tend to bloom only one color. Their colors range from white, pink, red, and a number of shades between. Camellias will inject beauty into any landscape garden they are planted. 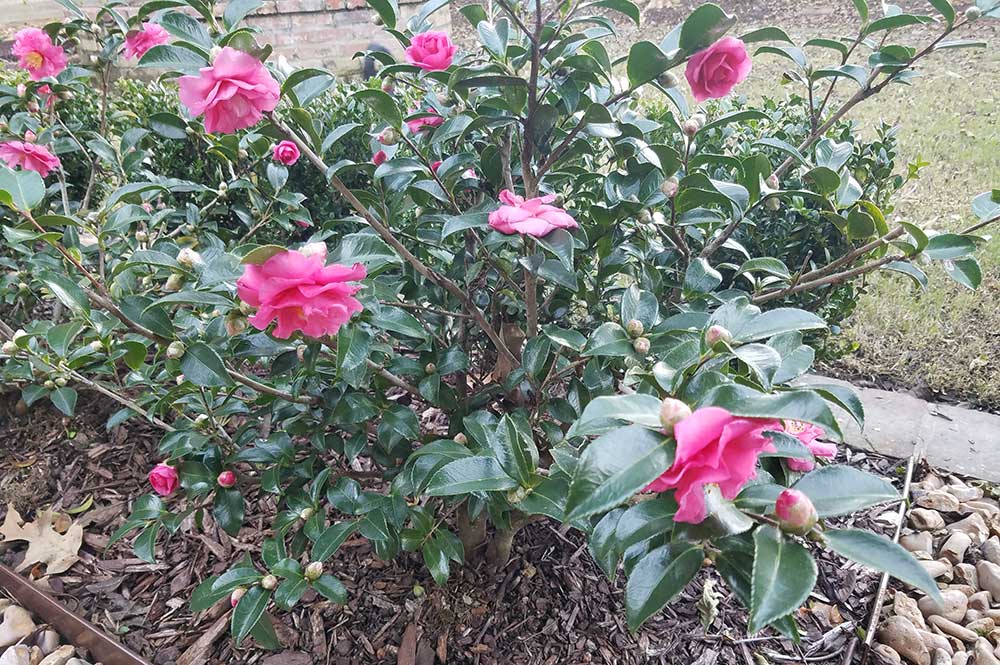 Shi Shi Camellia Camellia Care
Camellias are easy to maintain. This is nice since so many people have them still alive in their landscape beds at their homes. Camellias like partial shade, since too much sun can cause problems. They prefer acidic, well drained soils. Organic mulch can do wonders for your camellia. Camellias do not need to be pruned often. If you do need to prune, do it in spring after they have finished blooming. Camellias sasanqua C. sasanqua is the smaller of the two, usually staying in the form of a small shrub range between 2 feet and up to 12 feet.. These tend to have a larger number of smaller flowers. Sasanquas like well drained soils and can handle dry spells better than C. japonica. Here are some we use: Shi-Shi Gashira camellia - dwarf, pink flowers, Louisiana Super Plant Snow on the Mountain - dwarf, white flowers Maiden Blush camellia - upright, pink flowers Yuletide camellia - upright, red flowers Camellia japonica These are a much taller camellia, growing an average 12 feet with some types growing as tall as 25 feet. These have fewer, but larger flowers. Japonicas need a lot of moisture. Here are some we use: Sarah Frost camellia - upright, dark pink flowers Sea Foam camellia - upright, white flowers Omega camellia - upright, white-pink flowers Royal Velvet - upright, red flowers 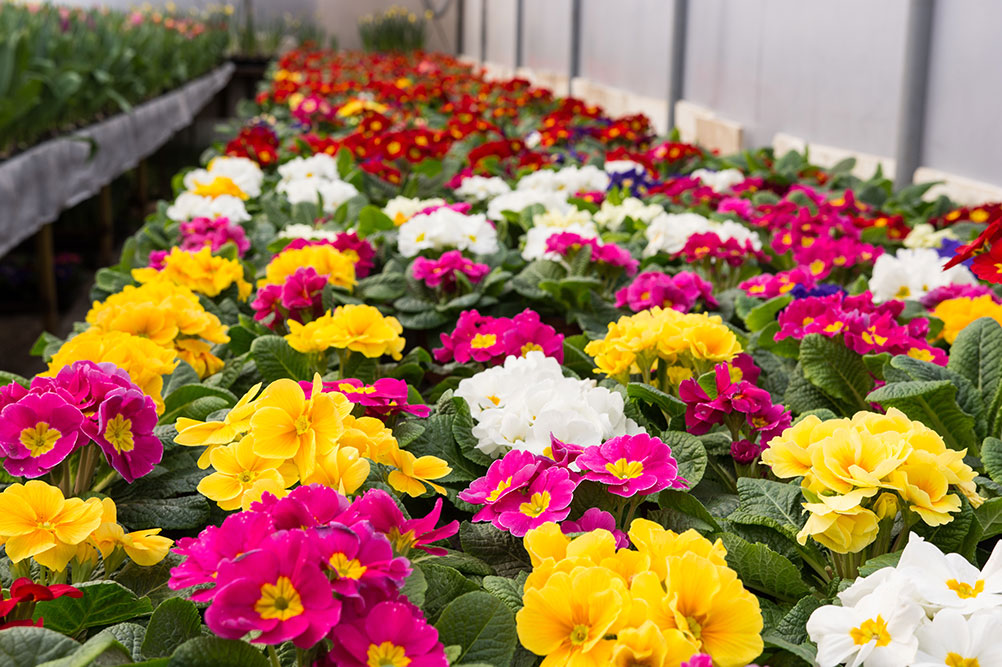 Primroses in a greenhouse We are finally getting some crisp cold weather. Those warm season flowers of summer are all but dead at this point and should be pulled up. After pulling the old plants, you will need to prepare the soil.
Pull the weeds first. Add at least two inches of organic additives like chicken manure, compost, etc. Till the soil between eight and twelve inches deep. Sprinkle on your choice of fertilizer. Form the bed into a nice plateau and rake it smooth. For new beds, most cool season flowers want sun. Choose areas that are well drained and have a lot of sun. The more sun, the better. If growing flowers from seed, read your seed packet closely to get the correct planting depth and spacing from other plants. Generally, the smaller the seed, the closer to the surface they are planted. If you accidentally plant too many seeds, thin them out when they start to grow. Overcrowding will make your plants under perform. Use mulch. It prevents weed growth, deters fungus from spreading, and holds moisture in the ground. Keep your colors simple. Stick to one or up to three colors per grouping. Too many colors become distracting instead of interesting and enjoyable. It is time to pick out your flowers that will last into spring. It is important to get those flowers into the ground so they can get established before the real cold season hits. Here are some nice flower choices for areas that get at least six hours of direct sunlight: calendula, delphinium, dusty miller, galliardia, geranium, holly hock, larkspur, nasturtium, ornamental cabbage, kale, petunia, poppies, snapdragon, statice, stock, sweet pea, and toad flax. Sometimes you have a shady area that could benefit from some color. If you have an area that gets at least four hours of direct sunlight, try out the following flowers: viola, pansy, alyssum, diascia, and columbine. If you have an even shadier area that requires color, try out the following flowers: cyclamen, foxglove, primrose, forget-me-not, and lobelia. Some cool season plants will bloom in fall, lose their blooms, and bloom again in spring. Think of these as getting double for what you paid for and enjoy the show. The extra root development will lend itself to much larger blooms in spring. Last month we had an exceptional amount of rain. It felt like the sun had abandoned us for some weeks. Since we had so much rain, small drainage problems in your yard may have become large drainage problems. Here are some common drainage solutions to your frequent drainage problems. 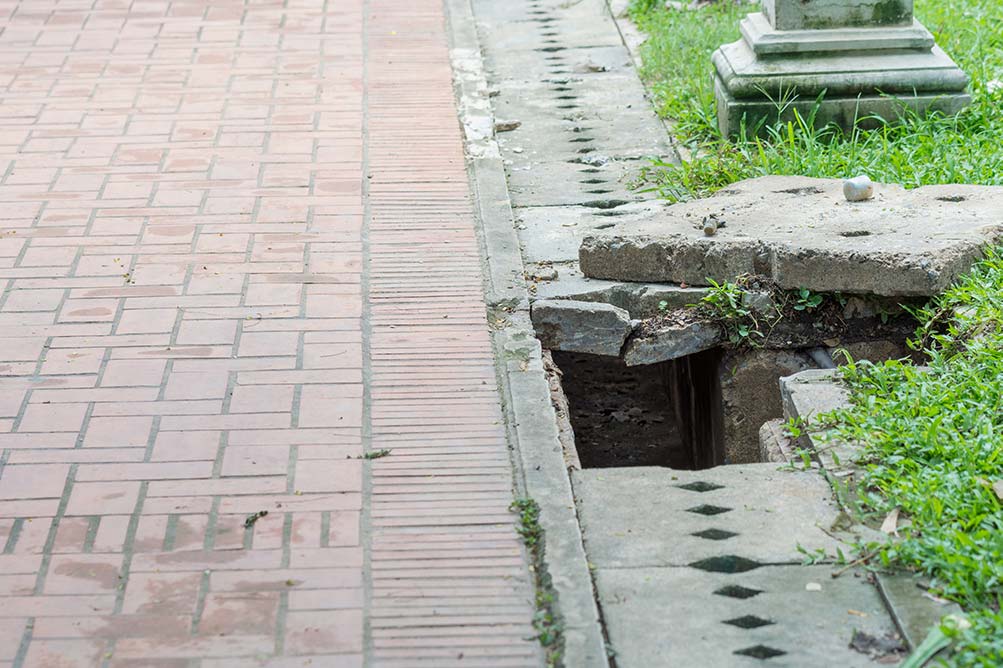 How to fix the unwanted new pond in my yard?
Large areas holding water are caused by poor grading. If possible, you will need to level that part of your yard to slope toward a desired area to drain. If using large equipment on your yard is not possible or desired, an underground drain can be installed to move the water elsewhere. These drains usually tie into a pipe and leads to the closest road. How to stop my landscape beds from getting washed out? Excessive water from your roof causes a lot of wash outs. Installing gutters is a quick solution to capturing most of the water and moving it elsewhere. Another solution is to use rocks at the drip line of your roof. The rocks will break the water’s fall and guide it toward a more desirable drainage area like a small creek during rain storms. How to stop the water from sitting on the foundation of my home? Landscape beds and poor grading can cause water to sit next to your home's foundation. Sometimes, simply making a trench through your bed can allow the water to drain. A small pipe can also be inserted into the bed to let the water pass through. A more involved approach would be to install a french drain along the side of your home. This include water permeable layers on top and a drainage pipe beneath that leads out to a different area. The top is usually a rock layer which looks appealing to you at the rear of your landscape beds. How to keep the water from pooling on my walkways? Water sits on your walkways longer if the areas surrounding it are higher than the path. Also, the path should have been given a slight angle to drain toward a road or drainage area. If these were not done originally, drainage gutters can be added along side the pathway. These are covered with decorative drain caps so they add or enhance the pathway. Another solution is to add a drain to the center of the location holding water. If you have a problem with standing water in your yard, please contact us today for a free drainage quote. This is the time to prepare your grass for the dormant season. This means that your grass will no long spread out and fill in thin areas, so don’t do anything that can cause damage. This includes excessive core aeration or dethatching. Save that for spring. If you need to fill in an area of open ground, use sod in early October so it has time to root into the ground. Anytime later and you are likely to have dormant sod sitting on top of your soil until the following spring.  Switch your fertilizer away from high nitrogen varieties. Nitrogen promotes growth and your grass is finished growing for the year. You will only fertilize weeds and fungus if you apply high nitrogen fertilizers now. Instead, fall lawn care requires the use of fertilizer that contains a lot of potassium and low nitrogen. The potassium will help fortify the grass against winter damage so it will look better next spring.
A lot of your summer weeds will die off soon until next year, but winter brings its own set of weeds. Most winter weeds are not as problematic as summer weeds. They do stick out like a sore thumb since they are green in a lawn of winter yellow. Apply a pre-emergent now that targets winter weeds so those weed seeds never even have the chance to grow. Read the product label and follow it. There are some bugs that can cause problems in fall. Both sod webworms and army worms can cause a lot of damage quickly. Look for grass that has bite marks and for small moths flying out of the grass when you mow. If you see these signs, treat the area with a product labeled for your grass type and the worms mentioned. Sometimes these insects have already laid their eggs, so you will need to check and see if the problem returns in a couple weeks and retreat as necessary. Fall is the time for lawn fungus. You may have noticed mushrooms in your flower beds already. Circular yellow-brown rings in your lawn are a sure sign of fungus. Brown patch and take-all patch are the usual culprits around south Louisiana. These two fungi can cause some real damage to your yard if left untreated. If you notice the circular pattern in your yard, get some fungicide from the hardware store and treat it early. The area inside the circle is most likely dead already, so you are simply trying to prevent the patch from spreading further. These areas will be thin next spring and primed for weeds to take hold. If you have had a problem in the past with these fungi, we recommend applying preventative fungicide treatments every two weeks during October. Are you tired of looking at a drab yard during the winter? If you would like some green grass this cool season, October is when you want to spread out some rye grass seed. This cool season grass will look great in the winter and will die off on its own when the weather warms up. If you decide to do this, make sure your pre-emergent does not prevent rye seed from germinating. This is a common mistake which causes people to waste their time and money since they are killing the seed they want to grow. There are a few varieties of rye seed. Look for one that stays low as it grows. You will get the benefit of green grass without the need to cut it during the winter. Twenty two giant sized men run around and tackle each other on a natural grass field for a couple of hours during a football game. They come back and do this between two and three times per month for an entire football season. How is it that the grass looks really good when it probably shouldn’t even be alive at the end of the season?  First, preparation is key. The right choice of grass makes all the difference. For the climate in both Baton Rouge, New Orleans, and other parts of south Louisiana, a hybrid Bermuda grass can take a lot of damage and regrow in a matter of days. Soil composition which allows easy movement of water, air, and roots will shorten recovery times after field use.
Off season core aeration and top dressing keep the field healthy during use later in the year. Actively reducing soil compaction in the off season allows for some great root development. Top dressing the soil will even out the low spots the field created by players repeated use during football season. Next is prevention. Regular overseeding during the entire season keeps a continuous supply of new grass to replace the damaged areas. The players cleats help to sow the new seeds. The new grass seeds get plenty of nutrition and sunlight on a low cut field and start growing quickly. Irrigation lets us fill in mother nature’s gaps. Sunlight and water go a long way in promoting growth for grass. Complete, consistent coverage for the playing field is vital. This is paired with great subsurface drainage to get the roots enough water, but not too much water. Fertilization gives stressed grass what it needs to grow. Maintaining an accurate fertilization program keeps the grass growing and green. With the right fertilizer, irrigation and sunlight, hybrid Bermuda grass is a growth monster. Bare areas will be covered with grass in a weeks time. The last tool is replacement. Replacing is usually the most expensive option, but is necessary at times. This typically means installing new sod to a very damaged area right after a game and nursing it’s root growth. If you have a very rough area of grass, focus on the repairs when there is an off week or an away game. The extra week of care will really show on the next home game. Continuous wet weather leads to the right conditions for Entomosporium leaf spot to develop on your Indian Hawthorne bushes. Look for small, reddish-purple dots on new leaves that seem to die in the center of the spots. Yellow outlines will form on the outline of the spots. Later you will see the leaves turning red and falling off. This leaves your Indian Hawthorne with a lot less leaves and looking really unhealthy.
This fungus lives on the leaves that are infected and also on the surface of the ground. If you catch it early, remove the infected leaves. Like most fungi, removing select branches and allowing more airflow will let the plant dry quicker. This creates a less pleasant place for the fungus. Also remove the old leaves that have fallen to the ground. Fungicides will help in controlling Entomosporium leaf spot. Use it about every two weeks when the weather keeps the area wet and the temperature is not hot enough to dry out the plant leaves quickly. Spring and Fall are prime time for this fungus to develop. If you continue to have problems with this disease year after year, consider replacing your plants with a different species. |

AuthorCharlie Casselberry Categories
All
Archives
April 2024
|
 RSS Feed
|
|
Contact |
Services |
About |
Locations
|
GreenSeasons
|
Baton Rouge Office
11628 S Choctaw Drive, Suite 227 Baton Rouge, Louisiana 70815 |
Greenwell Springs Office
14461 Frenchtown Road Greenwell Springs, LA 70739 |
Slidell Office
56010 Highway 433 Slidell, Louisiana 70461 |
© 2020 GreenSeasons