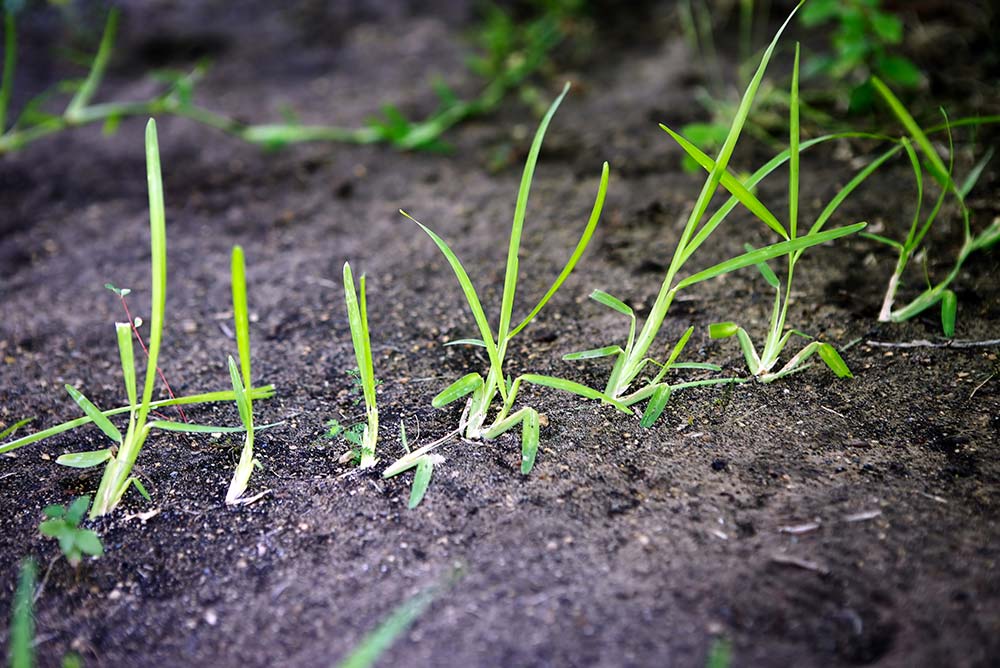
 The temperature is warming up and you look outside at your lawn and wonder, "What happened?" You are not alone. Winter can do things to turn your beautiful lawn into a quite a mess. Let's go over what you can do to get your lawn looking its best again.
How to get rid of broadleaf weeds from my lawn? Your lawn most likely has a lot of broadleaf weeds, including white clover, thistle, Carolina geranium, dollarweed, dandelion, and more. These should be easy to take care of using weed control products you can find at your local hardware store. Important: Make sure you are aware of your grass type and focus on the temperature restrictions for the product you choose. They can be the difference between dead weeds and a dead lawn. How to get rid of annua poa from my lawn? The best way to get rid of annua poa is to use a pre-emergent during the previous late October to November. Since we didn't do that, you can use a weed control product containing atrazine. Be sure to follow the label as there are restrictions based on time of year, grass type, and state. How do I prevent weeds from growing in my lawn? Apply pre-emergents now to stop summer weeds before they start. Pre-emergents are usually cheaper than controlling weeds after they grow. Read the label for your pre-emergent to see if it controls the weed you are having trouble with. Common summer weeds are purple nutsedge, spurge, dallisgrass, goosegrass, Virginia buttonweed, and crabgrass (crabgrass pre-emergent should be started in November to December in the prior year). How to stop fungus from damaging my lawn? Fungus is active during cool nights and warm days (read as spring and fall). Apply a preventative fungicide just as the the weather is favorable for these conditions. If your lawn already has a active fungus, you will need to use a curative fungicide. Some curative fungicides recommend combining with a preventative. Read the label to be sure. Fungi also enjoys a nitrogen rich environment. This means it is a terrible time to add a lot of nitrogen to your lawn. A small amount of nitrogen should be okay if it comes paired with a soil additive, just be cautious since it can turn a small fungal problem into a big fungal problem. What to do about low spots in my lawn? Low spots in your lawn hold water which damage the grass roots and lead to weed patches. If you have low spots, top dress them with sand or compost. You can choose to sod over these spots or to let nature do its thing and have the grass slowly grow. Test irrigation coverage and problems Setup your irrigation time to operate for spring. Run a full cycle on your irrigation system. Check for obvious leaks (giant geysers) and for full coverage of your lawn. Changing a few tips now will keep your lawn well irrigated when the weather heats up. Clear clogged drains If you have drains that aren't draining, it is time to clean them. Sometimes this requires a call to a professional drain cleaner since it requires special equipment. Older, poorly maintained drainage may require a complete rebuild.
0 Comments
Soil pollution is a paramount environmental challenge that will only increase in the future. People keep looking for ways to correct the soil as more industrial sites contaminate it through spills and accidents. Testing shows heavy metals and oils are the main threat to our soil safety. Surprisingly, landscape choices can help to remove contaminants from the soil at these sites through a process called phyotoremediation. Using select plants on these sites can greatly improve the earth.  Plants can have a huge impact on keeping the ground clean by reducing, trapping, or removing contaminates from soil and water. It is the simplest way to do it and it is nature based solution. No large machines or experimental mixes necessary. Obvious sites for phytoremediation are at brownfields or landfills. Another location would be large population centers where pollution activity is hard to monitor. Below are some choices for phytoremediation you can choose.
You have a nice, clean walkway around your house and then the rain comes. Suddenly, what seems like every loose bit of soil in your yard finds its way to the walkway. Dirty walkways are not inviting and can be very frustrating as a homeowner. You tend to keep asking the same questions. Why is this happening? Why does it seem like your house is the only house one where this happens? What can you do to keep your walkway from getting dirty when it rains? 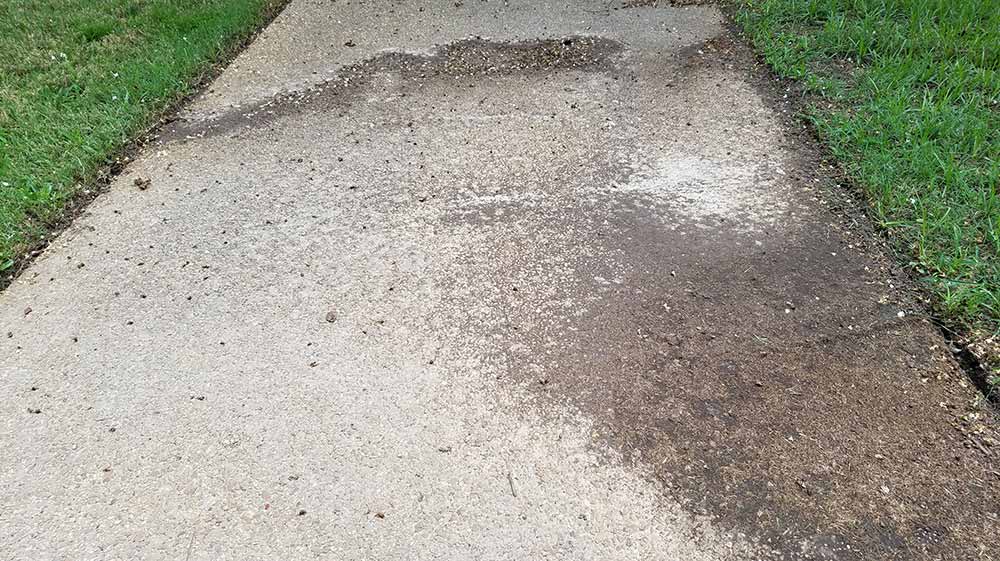 It was spotless before the rain Why do some walkways get dirty when it rains and some stay clean?
Your walkway is below the level of the soil. This can be caused by a few things:
How to fix a walkway that is gets dirty after it rains? Solution #1 The solution is simple, but pricey. Demolish and replace the section of your walkway. If your walkway is lower than the surrounding soil, that is the only solution that will give your guaranteed results. Solution #2 See solution #1. Solution #3 This can usually be corrected with landscape border material. There is a thin landscape border made of either rubber or metal that will keep your overflowing landscaping in check. Hardscape edging, like stones or bricks can also dam up your landscaping. Solution #4 Contemplate and install a drainage solution. A lot of landscape material floats, so you need to get the water moving before it gets too high. French drains, burms, ditches, and grading are all solutions you can explore to correct an excessive water problem. Solution #5 Setup an area with rocks, pebbles, or a french drain to catch where the water comes off the roof along the drip line of your home. This will keep the water from washing out your landscaping onto the walkways. It is summer time and you are outside admiring the great looking lawn you cut a few days ago when you spot it, crabgrass. Crabgrass weeds blend in with your lawn when cut, but will quickly grow taller than the surrounding turf. Many people cut their grass more often to maintain the uniform appearance, only to have this weed pop up and drive them batty. Let's figure out how to get rid of crabgrass so you can get back to a normal mowing routine. 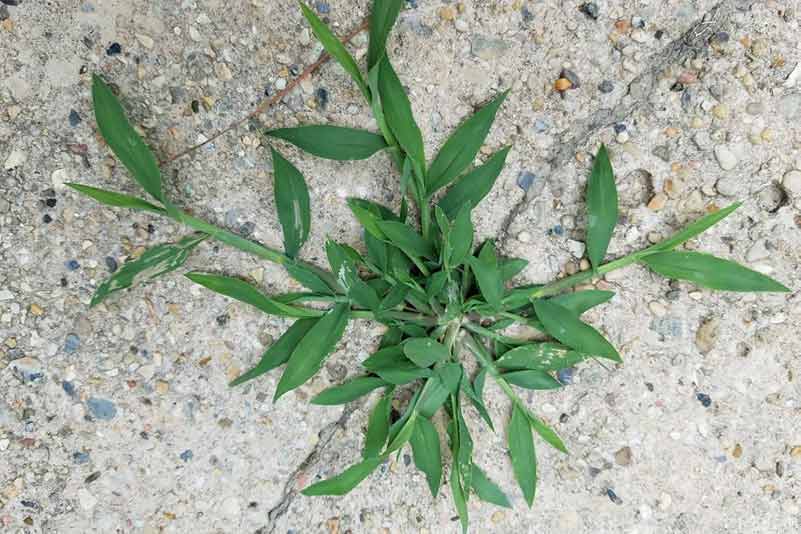 Smooth Crabgrass Crabgrass Prevention
Prevention is the name of the game with crabgrass. Crabgrass is an annual weed. This means it will die off on its own each year (yay!). It also leaves a lot of seeds that will grow again next spring (boo!). If you want to really control crabgrass weeds in the long run, you need to use a pre-emergent herbicide. We use a product called Dimension which contains the active ingredient dithiopyr. Search your local hardware store for a pre-emergent product with either this active ingredient or any grassy weed pre-emergent labeled for both your turf type and crabgrass. Time the pre-emergent application for late fall and/or mid-winter depending upon the product label. Pre-emergents need to go down before the new weeds sprout or they will not work. Prevention can also occur by keeping the rest of your grass healthy. Don't leave thin areas since this creates an opening for weeds to take root and grow. Fertilizer and water are your best option here. Keep healthy grass and the weeds can't get sunlight. Crabgrass Control Prevention is great for next year, but what about the weeds in your yard today? Luckily, there are a lot of options available to consumers that are readily available at the hardware store or through the internet. Be certain to check which turf grasses the product can safely be applied over. You don't want to be the guy that has a brown yard because he didn't check the label first. (This happens more often than you would think.) Don't spray your whole yard if you only have a spot of crabgrass. No need to risk an accident when it is unnecessary. Additionally, most products require a second application a few weeks after the first for proper crabgrass control, but check the label to be certain. If all else fails, grab a shovel and a few pieces of sod. It can be labor intensive, but the results are both guaranteed and immediate. We often get asked, "What is something I can do to make my garden look better?" Here are some of our most common suggestions for homeowners to improve their garden. 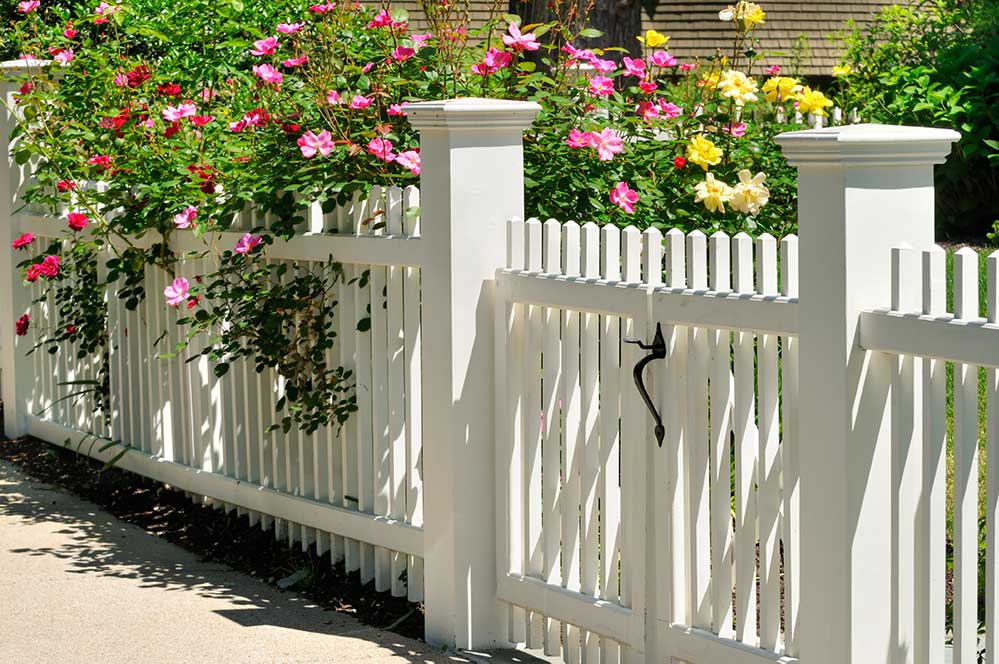 Welcome With Flowers Flowers inform your visitors that they are welcome. An assortment of flowers near the entrance of your home sends the right type of warm message for company. Flowers add color that attracts the eye while softening hard edges. It would be nice to have flowers everywhere, but most people are on a budget. Flowers Are Not Just For The Ground Hanging baskets and raised planter boxes will take your garden to the next level, literally. This method creates visual layers which is quite appealing. Hanging baskets can adorn walk ways and patios. Raised planter boxes can liven up a drab patio. Experimenting is easy since you can simply move them to a new location. Remember to layer your baskets and planter boxes. Three types of plants should be in your containers: something that drapes, something that fills, and something tall. Choose Flowering Plants This seems like a no-brainer, but a lot of landscapes are severely lacking in flowering plants. Lilies, irises, and hydrangeas are nice choices for some low maintenance color in your garden. Azaleas, gardenias, crepe myrtles, and camellias should keep your yard in bloom for most of the year. 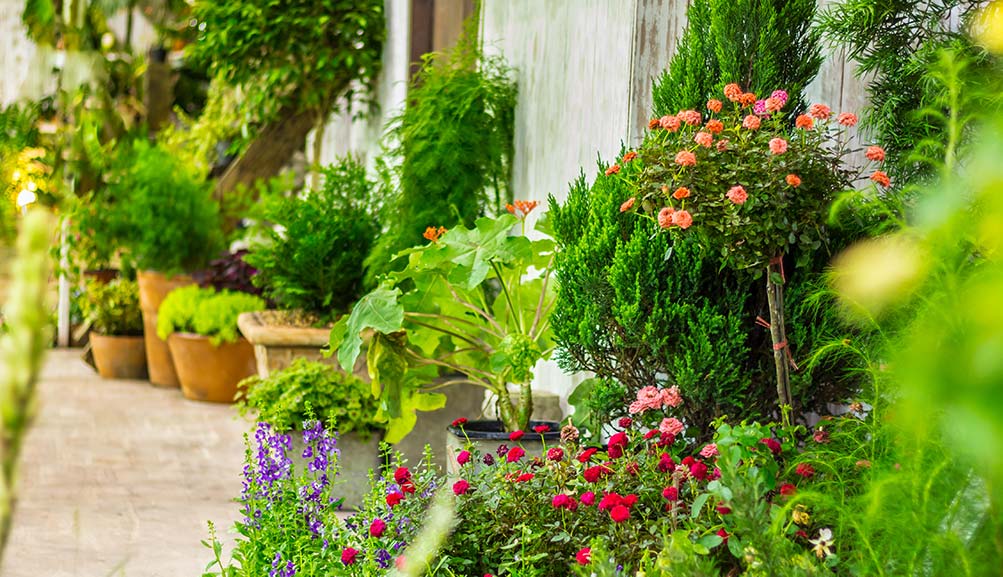 Potted plants in front of shed Hide Your Shed
Sheds are functional, but most do not look great. Try lining your shed with some potted plants that get tall. A trellis with a flowering vine can screen a plain looking shed. Try a vertical herb wall. It will add some character and be useful when cooking. Make It Memorable Your backyard is yours to enjoy. Make something just for you that you love. If you have a large backyard, use the extra space to create an escape that you and friends clamor too. An outdoor oasis can include water features, statues, ornate outdoor furniture, grownup tree houses, or other hidden surprises. 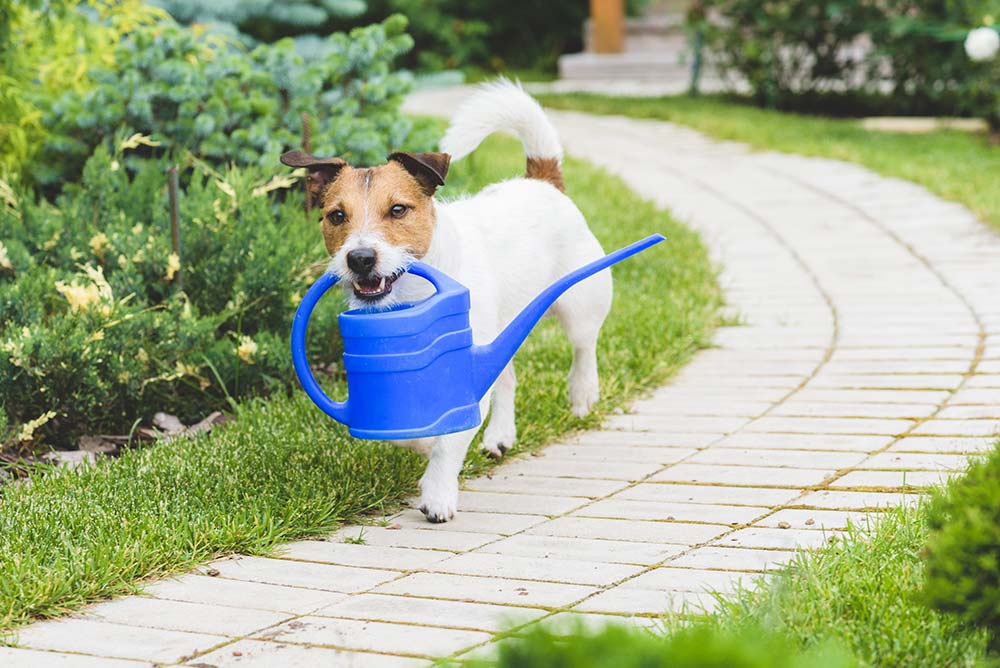 Dogs can easily make a mess of your landscaping. Dogs can trample, chew, and dig a garden into a mud pit in no time. Our advice, stop fighting your dogs on what they are doing. Work with their natural instincts to make a place that is good for plants, people, and canines. Dog breeds differ greatly. Figure out what your dog needs and be sure to include it. Keeping your dog happy will lead to an area that is easier to maintain. Doggy landscaping requires some extra work and a lot of patience. 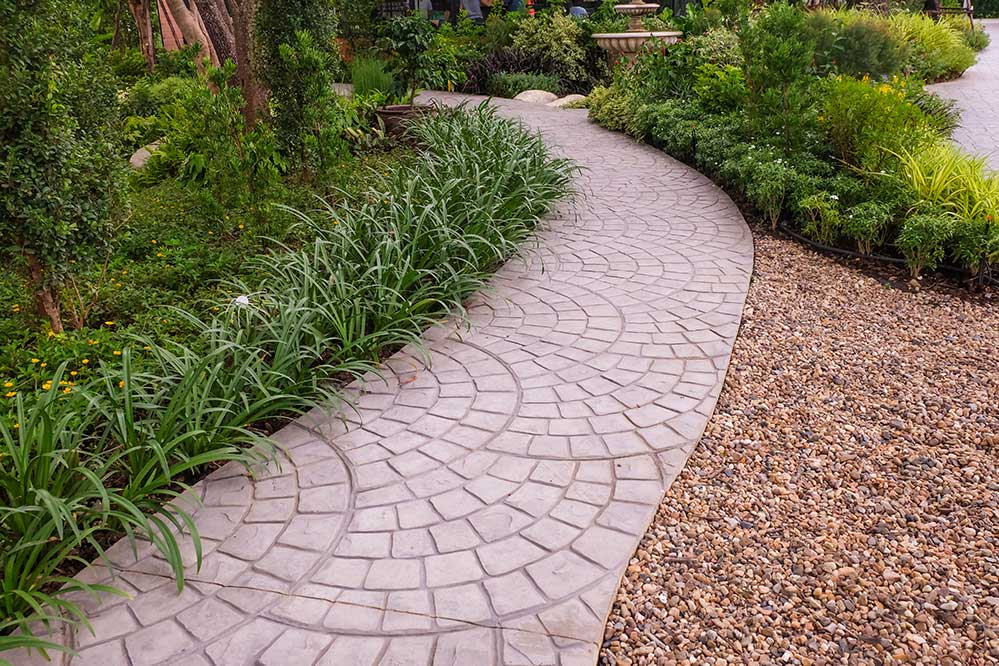 What should be in a dog friendly garden?
Grass Type - Dogs run a lot. Be sure to pick a grass type that can handle the traffic. Athletic fields in the area use Bermuda grass. It requires full sun, but it can take a lot of traffic and repairs damage quickly. Running Track - Dogs love to run. They are already running in a set path in your yard. Instead of trying to change their doggy behavior, work with it. Make a nice looking path out of flagstones, smooth pebbles, decking, or concrete. This will keep the paths less muddy and their paws cleaner. If your fur baby runs along your fence, give them a solid path. Dogs patrol the edges of their territory. Enhance their path to keep it looking great. Marking Post - Give your dog a toilet of sorts. Set up a stump, post, or even a faux fire hydrant in a set area in your yard. Reward the pup for taking care of business in that area. This will lead to less dog spots in your grass and an easier area to clean up after. Sturdy Plants - Pick strong plants that can take an excited dog running through them. Soft leaves are better for dogs since they shouldn't scratch them. Ornamental grasses work well also. Arrange your shrubs to they will grow densely. Dogs tend to not make a path in places that are hard to go through. Layer your landscaping with dense plantings in front of shrubs. Shade - Dogs play in the sun, but rest in the shade when it is hot. Shade trees and covered areas are prime real estate for doggy naps. Provide an inviting spot under a shady tree to guide your dog. Soft Mulch - Mulch that feels good to a dog is mulch that will not be dug out by a dog. If your dog has a favorite place to lay down, a nice soft mulch will make it look better. Be sure to pick a mulch that will not get stuck in their fur. Borders - Small fences, stones, and hardscaped borders keep your dogs from running through areas they shouldn't. Find an aesthetic that works with your landscape style and go with it. If you don't like the look of borders in front of your landscape, use it as a temporary training tool. After a few weeks, remove the fence and see if the your dog's behavior has changed. Water Feature - Pick a water feature that looks good, sounds nice, and provides clean water to refresh your dog. Choose a water feature that your pet can get out of in case they fall into it. Also pick one that is easy to replace the water. Safe Landscaping - Obviously, don't use thorny plants. While they prevent your dog from going somewhere, they can also cause injury. A lot of plants are poisonous to dogs. While dogs don't always eat everything in the yard, cautious pet owners can choose to avoid the option all together. Here is a link to a list of plants that are dangerous to pets. https://www.aspca.org/pet-care/animal-poison-control/toxic-and-non-toxic-plants Spring time in Baton Rouge brings nice temperatures and excessive rain. The warm and wet weather leads to a large influx of new weeds popping up in your lawn. The weed seeds have waited underground all winter to rise up and show off. Poa annua, aka annual bluegrass, can be an eye sore for many lawns in Louisiana. The weed is an annual, meaning it will die off on its own each year, which is good. Each weed produces hundreds of seeds, which is bad. The seeds can also lay dormant for multiple years, so you will have to have a good treatment plan in place over a long period of time. 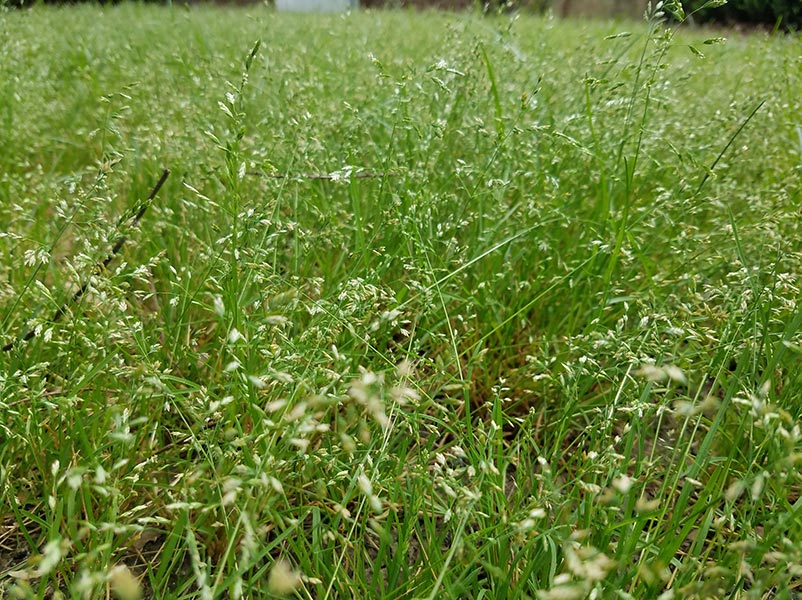 Poa annua in a lawn How to Control Poa Annua Poa annua is best treated by preventing the large amount of seeds in the ground from sprouting. Poa annua seeds start to germinate in late fall, so you need to have a pre-emergent down before that and throughout the winter into spring. Since the seeds can stay dormant, this will need to be done for a few consecutive years to get close to eradicating the Poa problem. Step 1 - Pre-Emergent Herbicide We recommend using a pre-emergent that has pendimethalin as an active ingredient in September. Follow that up with another round of pre-emergent containing the active ingredient dithiopyr in November and again in either late January or early February. Be sure to check the product label for usage rates, timing between applications, maximum annual rates, and which types of grass your product can be used on. 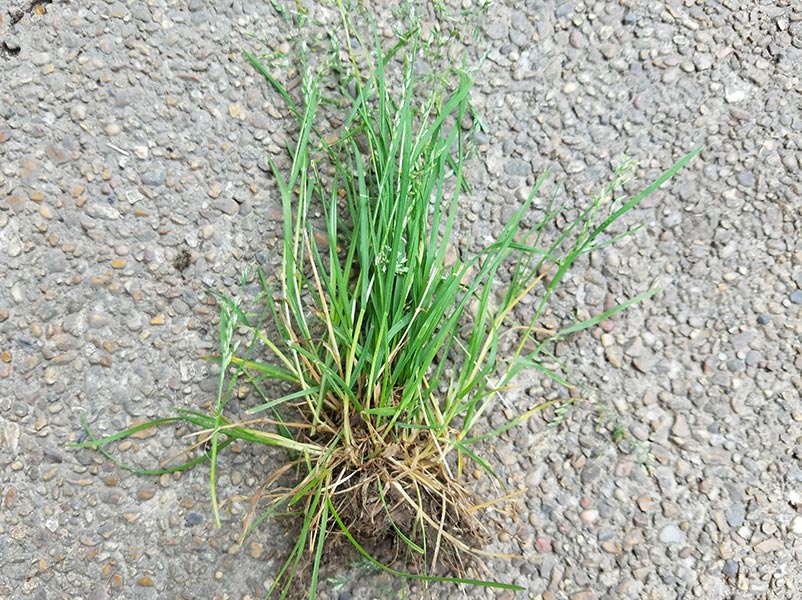 Poa annua isolated on a walkway Step 2 - Post-Emergent Herbicide
Even with perfect pre-emergent timing, some weeds manage to slip through and grow. This calls for post-emergent herbicide treatment. Look for a selective post-emergent herbicide that lists annua poa as a controlled weed and your grass type as a tolerant turfgrass. Alternatively, if you only have a few weeds, you can pull them when you see them. If you have a really bad weed infestation, be patient. It will take a couple of cycles to get the problem under control. The good news is you will see drastic improvement in the first year. The other great thing for us is poa annua cannot survive in temperatures over 90 F. When May rolls around, your poa problem will go away until fall. We have been preaching to anyone who will listen for years. Do not top, pollard, knuckle, shorten, etc. your crepe myrtles. It is bad for the tree's health, it looks bad, everything about it is wrong. It doesn't matter if your parents, grandparents, neighbors, or friends have done this for years. If they or you are still doing this... stop, pretty please. 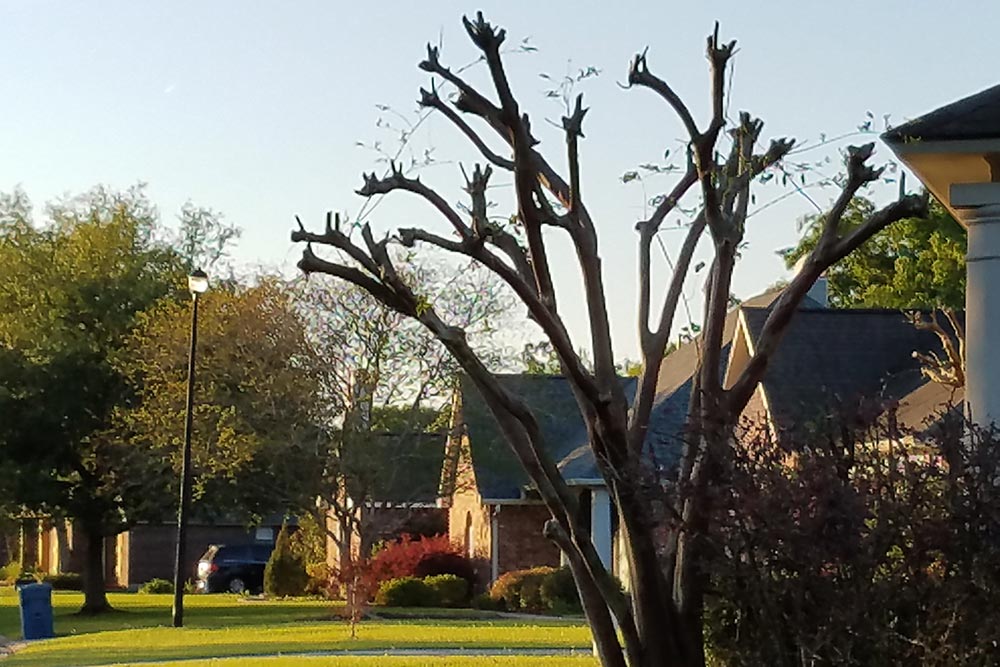 How to Fix Your Crepe Myrtle
If you have been topping your crepe myrtles for years, there is a way to get them back on track over time. If you have a knuckled mess from years of trimming branches to the trunk, you are going to have to top the tree for the last time. Cut just below the knuckled mess that has been created. If your tree was clear cut at the tops, then you can skip the previous step. Next you have to wait a few weeks until new growth starts at the top. There should be a lot of small, new growth. Pick a few to keep from the tops of each trunk that are growing up and away from the center of the tree. The rest can be removed with pruners. You will let these continue to grow. Every year to six months, you can remove the smaller new growth and branches that form that grow towards other branches. It is going to take a while to look better. We are talking three to five years. If you are impatient, look into transplanting a new tree to replace it. Train Your Crepe Myrtle to Grow the Right Way Traditional pruning, or training, for crepe myrtles should keep splits in branch growth in threes. While not definitive, a good guide to go by is three limbs every three to five feet of height. Start of with three, then nine, then twenty seven. Always train your tree branches to grow up and away from the center. Remove small limbs that cross other limbs. Your goal for crepe myrtles is to have them resemble flowers in a clear vase meaning blooms up top and a center you can generally see through. Get Rid of Crepe Myrtle Suckers Small pruning for suckers can be done anytime they pop up. Those are the micro branches that pop out of fresh cuts or just about anywhere. Take some pruners and remove them, especially from the base of a mature tree. What If My Crepe Myrtle Is Too Tall If your crepe myrtle is too tall, you need a different variety of crepe myrtle. I know it is not what you want to hear, but cutting the top off looks bad and the point of a crepe myrtle is to look good. Transplant your existing crepe myrtle where it can grow and plant something else in it's place. Do you have an area of dying grass in your yard and don't know why? During spring and fall you are likely dealing with a lawn fungus known as brown patch or large patch. Spring and fall are prime time for lawn fungus trouble. This fungus problem seems to come back and plague the same properties each year. If you have had brown patch in the past, take steps to treat it each spring and fall season.  What does brown patch look like? Brown patch can look different depending on the type of grass in your lawn. Dark brown border with a rounded shape. It can appear circular or irregular. Thin grass inside middle of the border. Brown patch damage can vary greatly in size, ranging from a couple of inches to a few feet. 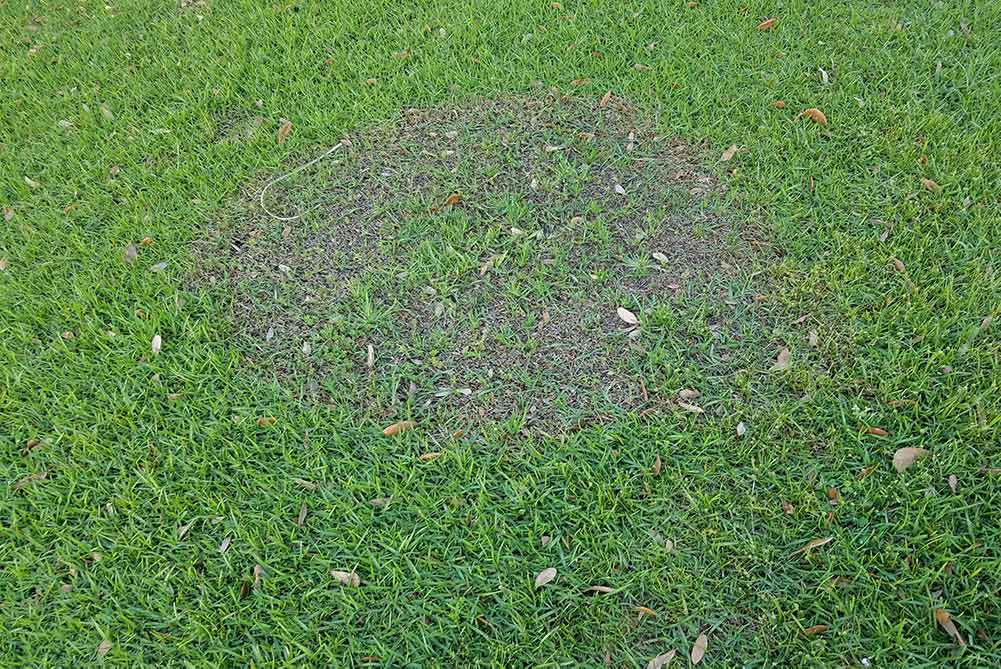 Brown patch fungus problems worsen with the following conditions:
Warm Days (70 F to 90 F) Cool Nights High Humidity Too Much Water Nitrogen Rich Soil How to control brown patch in your grass? Only water your lawn when needed. Only water in the morning so it can dry up by night. Postpone using nitrogen based fertilizer until the weather is consistently 90 F or above. Core aerate your yard to break up thatch build up. Apply a preventative fungicide when conditions favor brown patch. It is easier to prevent than to stop. If brown patch is active, use a curative fungicide labeled for brown patch. Follow the label. Everyone loves to get cut flowers. A beautiful display of color and fragrant scents truly liven up a room. A few days later and most people tend to throw out their once vibrant flowers. Well what if there was to get more bang for your buck? Read on to find out how to make cut flowers last longer. 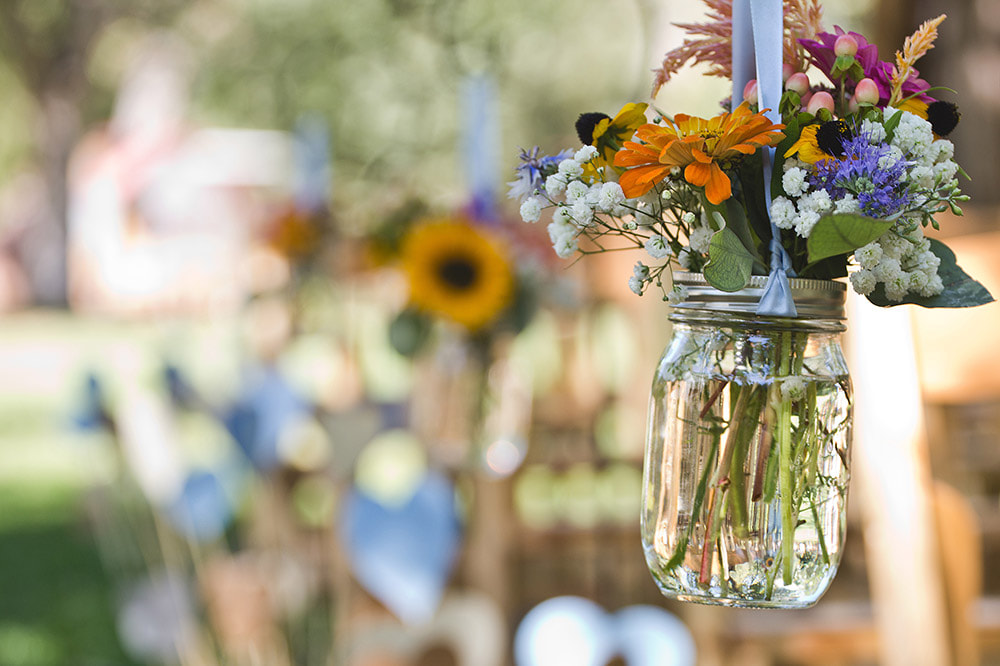 Use these tips to make your cut flowers last longer:
Always use a clean vase This may seem like a no-brainer, but many people reuse vases that have not been washed. Simply was your flower vases between uses and you are in the clear. Add something to the water Fill your vase up half way with cool, fresh water. Mix 2 tablespoons of sugar and 2 tablespoons of apple cider vinegar with some warm water to dissolve it. Add the warm mixture to the vase. The sugar feeds the flowers while the apple cider vinegar kills off bacteria. Keep the water level high Try to keep the water level around the half way mark in your vase. A lot of people forget to add water to their cut flowers and they end up dying early from thirst. You can add some extra sugar and apple cider vinegar when you add water. Rinse the stems A quick rinse under the faucet can remove bacteria that may have started to form on the flowers. Fewer bacteria means longer life for your flowers. Cut the stems Give them a trim before placing the flowers in the vase. Use a sharp knife to cut an inch or more off the bottom of the stems. Be sure to cut it at an angle. Avoid using scissors if possible because they can pinch the stem and prevent it from taking up water. Cut the flowers again About every 5 days, take the flowers out and cut off another inch or so from the bottom of the stem. We have found this can extend the life of your cut flowers. Stick it in the fridge That's right, stick it in the fridge. Before you go to bed at night, place the entire vase and flowers in the fridge. The extra time in the cool air preserves your flowers like nothing else. There's a reason why you see professional florist using large refrigerated boxes to keep their inventory fresh. These flower tips will keep your flowers looking great much longer. Give these a try on Valentine's Day and for all of your spring flowers you take inside from your garden. I hope you and your family can enjoy your flowers a little bit longer now. |

AuthorCharlie Casselberry Categories
All
Archives
March 2024
|
 RSS Feed
|
|
Contact |
Services |
About |
Locations
|
GreenSeasons
|
Baton Rouge Office
11628 S Choctaw Drive, Suite 227 Baton Rouge, Louisiana 70815 |
Greenwell Springs Office
14461 Frenchtown Road Greenwell Springs, LA 70739 |
Slidell Office
56010 Highway 433 Slidell, Louisiana 70461 |
© 2020 GreenSeasons