|
So, you're taking a leisurely stroll through your garden, dreaming of a floral paradise, and BAM! Moss decides to crash the party. Talk about an uninvited green guest. But fear not, my fellow garden enthusiasts! With a dash of humor and a sprinkle of easy steps, we'll show you how to give moss the boot and make room for your flowers to party on. 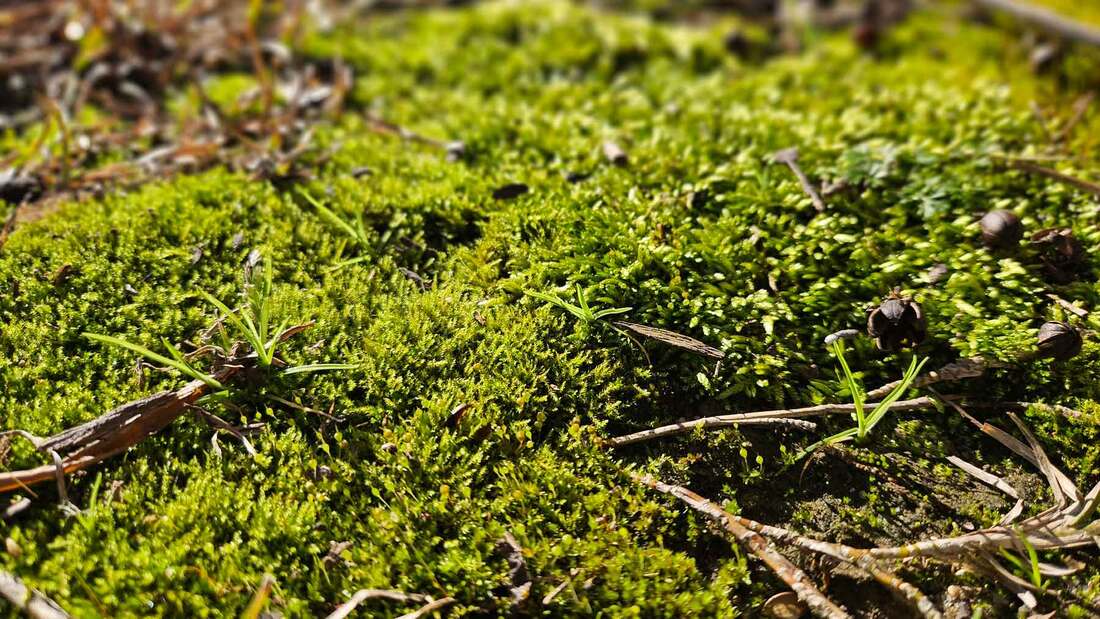 moss in landscaping bed Getting to Know Moss
Let's start by getting acquainted with our not-so-favorite neighbor, moss. It's like that friend who overstays their welcome. Moss loves hanging out in damp, shady spots with soil that's as compact as a crowded subway at rush hour. But worry not – we've got the perfect eviction plan for this green squatter. 1. Check Out Your Garden Vibes First things first, take a look around your flower beds. Are there shady spots hogging all the sunlight? Trim those overgrown branches and foliage to let the sunshine in. Moss doesn't do well in the spotlight, just like my cousin at family gatherings. 2. Give Moss the Cold Shoulder Moss hates the sun, so let's make your garden a sun-soaked paradise. Plant some flowers that love soaking up those rays. It's like turning your flower beds into a beach party – moss won't be caught dead in a sun hat. 3. Loosen Up the Soil Disco Moss loves to dance on compacted soil, but we're not hosting a rave here. Grab a garden fork and break up the soil. Let it breathe! Your garden should have the soil equivalent of a cool, indie coffee shop, not a packed dance floor. 4. H2-Oh No, Don't Overwater Moss thrives in soggy conditions, so let's not drown the party. Water your flowers like a responsible host – deep but not too often. Drip irrigation is like the VIP section for your plants – exclusive and targeted. 5. Soil pH Makeover Moss thinks acidic soil is the cat's pajamas. Show it the door by adding some lime to raise the pH. Think of it as a makeover for your garden – moss won't recognize the place. 6. Clean Up the Garden Party Mess Moss loves to crash in spots with loads of organic debris. Clean up those fallen leaves and twigs regularly. It's like telling moss, "Sorry, this party's for flowers only." 7. Bust Out the Moss-B-Gone Products If moss has already settled in like a stubborn in-law, it's time to bring in the heavy artillery – moss-killing products. Follow the instructions, and soon, moss will be history. Sayonara, green invader! 8. Scrape, Rake, and Toss Once the moss is defeated, scrape and rake it out of your garden. Treat it like yesterday's leftovers – into the bin it goes. No second chances for this party pooper. 9. Mulch Wisely Mulch can be a great ally, but not all mulches are created equal. Go for organic options like bark or wood chips. They decompose over time, unlike moss, which overstays its welcome. So, there you have it – a casual, humorous guide to reclaiming your flower beds from the mossy invasion. By making a few adjustments and showing moss the door, you'll be back to enjoying a garden filled with vibrant flowers and free from green gatecrashers. Let the floral fiesta continue!
0 Comments
Ever wonder why your yard is always muddy? Stepping in a yard that causes muddy shoes and wet socks is never fun. Muddy and messy yards can be caused by multiple things like improper grading, water-retaining soil, and multiple other problems. Another problem that can cause your lawn to retain more water than necessary is a clogged landscape drain. What Are Landscape Drain?Landscape drains go by many different names such as catch basins, area drain, or drainage basins. Landscape drains are helpful in areas that retain a lot of water. Landscape drains are the similar to floor drains such as shower drains. They usually look like a metal grate and they are usually located at low points in your landscape. The purpose of a drainage basin is to collect water. Landscape drains can take the water away from your lawn and make your yard less moist. 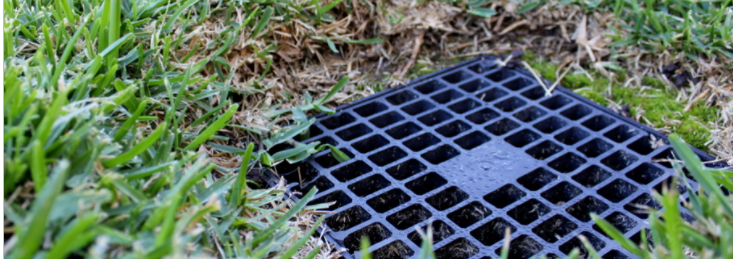 How to Unclog a Landscape Drain:To clean out a landscape drain you must first retrieve all the tools that would be needed to complete the job. Tools you will need include things such as a screwdriver, a pair of gloves, a shop vacuum, and a garden hose. After that, you should make sure that there is no debris blocking the top of the drain. For the next step, you can remove as much debris with gloves as possible. If you cannot reach the rest of the debris, you can use a shop vacuum to suck out the rest of the debris. After you have cleaned out all that you can, you can wash the rest of the twigs, dirt, and build up out with a hose. Finally once you are done cleaning it, you can put it back on the cover, and you are done. Ways to Prevent Basins From Clogging In The Future: Make sure that you regularly clean out your gutters. Keeping your gutters clean will prevent extra leaves, branches, and dirt from clogging your drainage grates or drainage system. Additionally, you should remove any large plants or rocks surrounding the drain so that water may enter.
 Do You Need to Hire a Gardener?
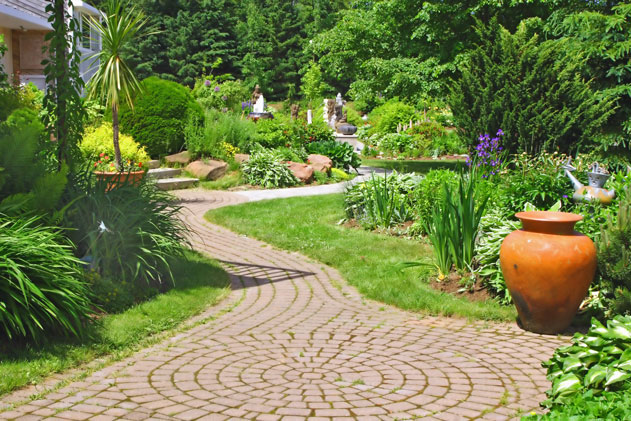
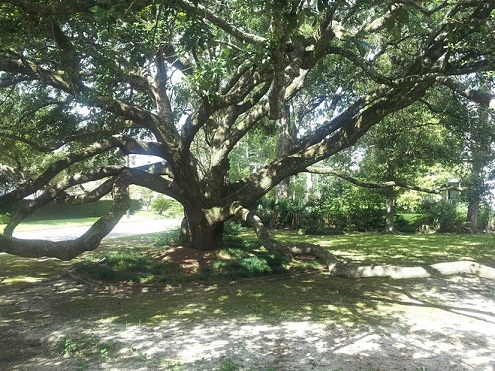
Whether you own a residential or commercial property in Southern Louisiana, you want to make sure your property looks great to everyone who comes past. This involves ensuring the landscape looks pristine. However, it takes a lot of work to keep a garden looking great in the Louisiana climate. You may lack the horticulture expertise to ensure every type of plant gets the nourishment it needs, so for reliable landscape maintenance, it may be in your best interest to hire a professional gardener. Here are some steps to take to help you determine if hiring a professional is ideal for you. Look at the Garden Before you start making any phone calls, you really want to consider the aesthetic of your garden the way it is now. If you end up hiring a professional, then you would want to know what kind of work would need to be done on a regular basis. For example, the expert may only need to mow once in a while and prune some trees. For more ornamental gardens, a lot more maintenance will be required. Additionally, you want to consider what the garden is ultimately going to be used for. If it is going to be used for parties frequently, then you may want to think about hiring a gardener more seriously because a lot more work will be done to keep it looking great to guests. However, if you want it to be a peaceful, calm place for you to relax, then you may not need a horticulture expert as often. Finally, you want to consider if there is a certain way you want your landscape to look like. If it is currently fairly bland but you would like a more Oriental aesthetic, then you should hire an expert who is knowledgeable of that appearance. There is no need to draw up blueprints right this second, but you need to know what to look for in a professional before conducting research. Interview Several Different Professionals After you have a good idea of what you want, you are ready to start scheduling consultations with gardeners. This does not mean you eventually have to hire one, but it does show you are serious about having the most pristine garden possible. As such, there are several questions you want to ask the gardener to make sure he or she is the best person for your landscape maintenance.
Finally, you should mention if there are any aspect of the garden you would like to handle yourself. Perhaps you do not have a problem mowing the grass once a week, and you do not feel like paying someone else to do it. Make sure you mention this information so that the gardener knows to eliminate a responsibility. Taking care of some chores yourself can help cut costs, and you will feel a greater sense of pride in maintaining your own yard. Think About Your Personal Situation After interviewing several different companies and having price estimates for each one, you may still have some lingering thoughts on whether to pull the trigger and hire someone. You really need to think about your personal life and whether you have the time and energy to give your lawn the attention it deserves. If you work crazy hours at your job, then it may be best to take one chore off your shoulders. Additionally, if you are arguing with your spouse about who should take care of the landscape, then it is probably best to let someone else handle it. It is important to bear in mind that you can still do some gardening tasks on your own if you want to exercise your green thumb. Perhaps you want to plant a few fruit trees and harvest the fruit at various points in the year. It can be a great lifestyle choice, but fruit trees require a lot of work. You can focus on what you are passionate about while someone else handles the dirty work. There are plenty of compromises, and gardening professionals will work with you to develop a system everyone is happy with. Start Calling If you are ready for your garden to start impressing everyone in town, then you should seriously consider hiring a professional landscape maintenance service. A gardener who understands a thing or two about proper horticulture will be a great asset. It can be an investment you enjoy for years to come. GreenSeasons is a great choice for a gardener in southern Louisiana. We have licensed horticulturist, licensed arborist, and degreed landscape architects to assist you with your gardening problems. Call today at (225)752-2333. "Most of us may not realize that azaleas represent the main nursery crop grown in many states in the Southeast and along the Gulf Coast. In Louisiana, they represent seven percent of all nursery plants grown." - LSU Agcenter As you can see, azaleas are the most popular shrub in Louisiana as well as most of the southeast. Anyone living in Louisiana or other gulf coast states would benefit from learning how to prune an azalea. When to prune azaleas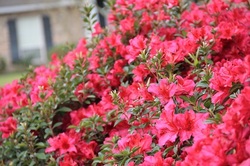 Only prune azaleas to keep them at their current size or shape. Pruning an azalea to make it smaller than it currently is will not only look awful, but will damage the azalea, possibly killing it. This is regularly done when an azalea has been planted too close to a sidewalk or parking lot. You will notice it has one side lacking any leaves or flowers and looks dead. Azaleas have very few leaves past the layer you see. Azaleas also experience the majority of their growth during one short period a year. This means if you cut an Azalea too close, you will have a reminder of it the rest of the year, and maybe longer. Historically the first time you prune an azalea each year should be in April or May. Although with the warm winters as of late, this seems to be changing. As a general rule you should prune your azaleas a week or two after all of their flowers have fallen off. This rule is easy to follow for traditional azaleas. Some newer varieties, such as the encore, will bloom throughout the year. It is still best to prune them shortly after they are done with a blooming period. Continue to trim the random shoot or two of new growth if they occur later in the year. How to prune an azalea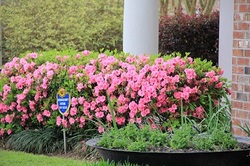
What to do if your azaleas are too bigIf you have azaleas that have grown too large for the area they were planted due to poor planning and pruning, you have three options:
Azalea Tips
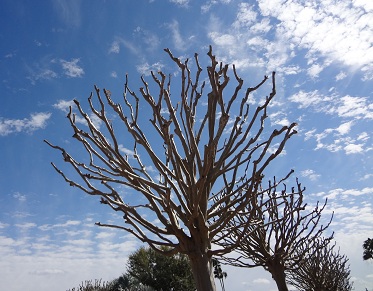
The correct way to prune crepe myrtles
The wrong way to prune crepe myrtles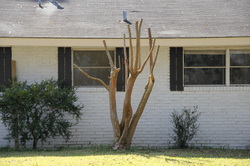 Do not top or knuckle your crepe myrtle, sometimes called "crepe murder". This creates poor tree structure and a significant loss of the tree's stored energy. This practice will lead to increased disease, a poor appearance, and, if used consistently year after year, the death of the crype myrtle. 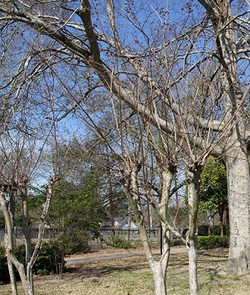 This is the irregular growth that happens when a crepe myrtle has been topped. It is very unhealthy for the tree and, I've gotta say, pretty ugly too.
 WHEN TO FERTILIZE A TREE?The best time to fertilize a tree is in spring with the next best time being late fall. Trees are actively absorbing nutrients and moving sap through their trunk during the spring. The tree will perform better if the nutrition it needs is in the soil. We do recommend a soil test so you will know what your soil is lacking. Be sure to mark down the type of tree before sending your test off so you can get proper recommendations on what should be added to benefit your tree to most. how often to fertilize a tree ?Smaller and younger trees can be fertilized every year. Normally older large trees only need to be fertilized every two years. They typically do not need to be fertilized more than that unless they show signs of damage. Damage would usually be caused by insects, fungus or a severe drought in previous years. If you are currently in a drought, please do not try to fertilize your tree back to health. If the tree needs water, fertilizer will actually cause your tree to get worse. Think about what would happen to a human who was severely dehydrated and ate to cure their dehydration. HOW TO FERTILIZE A TREE?First we need to discuss where the fertilizer is going to go. This may seem like common sense, but this is an area where most people mess up. On a large tree, the area from two to three feet from the trunk of the tree to one to two feet past the drip line is the place you want to apply fertilizer. On a small to medium tree, stick to the whole area from two inches from the trunk to the drip line. The drip line would be the place on the ground the water would drip from the tips of the branches furthest away from the tree trunk.
WHAT TYPE OF TREE FERTILIZEROrganic fertilizers and amendments are naturally occurring Examples are peat moss, compost, saw dust, bone meal, manure. These will not only increase the nutrients in the soil, but will help reduce compaction and allow water to be held better. These fertilize the soil as they decompose so it is less of an immediate effect. The good news is they will be there for a while so your tree will continue to benefit from them for much longer than alternatives. They also contain less salts than inorganic produced fertilizers. Inorganic fertilizers are cheap and scientific so you know exactly what you are getting. These are the most widely used for tree fertilization and get the job done. Three things we recommend are nitrogen, mychorrihizal fungi drench, and a systemic insecticide labeled for your tree. Aside from that, you should rely on the soil test results. Be sure to retest the soil near your tree every four to six years to see how you need to adjust your fertilization plan. *If your tree has a fungus problem, treat the fungus before fertilizing as fungus will thrive on nitrogen.
If you live in the Greater Baton Rouge, Greater New Orleans or anywhere in Southeast Louisiana, please feel free to call us at 225.752.2333 and have us help you in person. 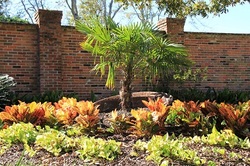 Palm trees are a widely use landscaping plant both for indoor and outdoor landscapes. They are generally easy to care for and thrive with sunlight, warm temperatures and good soil. Most species of palm perform very well in southern Louisiana. When their leaves turn yellow to brown have many people at at a loss as to what to do. There May Be a Problem With Your Palm's DietPalm Leaves Have Yellow Spotting If your palm has yellow spots appearing on an otherwise healthy tree, it needs some potassium. Apply a slow release fertilizer with a good amount of Potassium. Potassium in the middle number in the fertilizer breakdown on the front of your fertilizer package. Palm Leaves Have Yellow Stripes If there are yellow stripes on the lowest and oldest leaves then your palm has a magnesium deficiency. Use fertilizer with added magnesium and some extra dolomite on the soil around the tree to turn the tree's health around. Magnesium will be listed as Mg on most packaging. Older Palm Leaves Turning Yellow When older leaves begin yellowing, there is a lack of Nitrogen in the soil around your palm tree. The tree is literally canabalizing its older leaves for the nitrogen in them to support new growth. A bag of fertilizer labeled for palm trees from any nearby hardware store should have the tree looking great in no time. Your Palm Tree May Have a Bug or Fungus ProblemThis probably means you are dealing with either a fungus or an insect. Fungus will usually appear to be blotchy or spots of yellow on the leaves. An example of palm tree fungus would be fusarium wilt or bud rot. There may also be a powdery substance on the leaves. Insects will usually be accompanied by black soot on the plant, holes or tears in the leaves and damage to the trunk. An example of insects damaging to palms would be giant palm borers or thrips. There Isn't Any Signs of Pests and the Soil is FertilizedThe palm has proper nutrition, but the leaves are still turning brown. This is natural. as long as the transformation is fairly even. The leaves will eventually turn brown as part of the tree's life cycle. There is no need for them to turn prematurely though. Keep your palms fertilized and they will stay looking good for a much longer duration. Pruning Palm Trees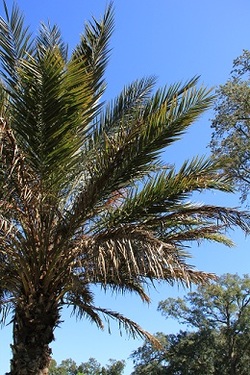 In best practice, you should not prune the leaves off the palm until they are completely brown. Doing so removes some of the nitrogen and other nutrition stored in the plant. That being said, a lot of people do not want leaves on their palms to be any color but green. If you are one of these people, you can prune the lower yellowing leaves off as long as your have the soil properly fertilized. If the leaves at the top of the palm are yellowing, you have one of the problems mentioned above. If you begin seeing other leaves yellow soon after pruning, your soil may not have had the correct amount of fertilizer.
When pruning your palm, be sure to follow the same pattern of cut as all of the other branches have been cut so the trunk of the tree is uniform. Usually all you will need is protective glasses, a hat, gloves, a pair of loppers, a ladder and someone to hold it for you. If it is your first time pruning a palm, remember to take your time, be careful and it will probably take you a lot longer per tree to prune than you originally thought, especially if its been a few seasons since you pruned last. WHY ARE PARTS OF MY YARD DYING?In southern Louisiana, both in early spring and again during mid to late summer is prime time for Chinch bugs. If you notice an irregular yellowing pattern in your lawn at these times, it's worth taking a look. A few moments of your time keep your yard from dying. 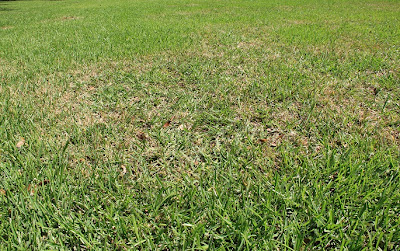 IDENTIFY THE PROBLEM.You can make the insects visible by getting down to grass level and parting the grass. If you can't readily spot any insects, you can try the "soapy water test." Get one gallon of water with one tablespoon of lemon scented dish soap and pour it all in your problem area. You should see the insects move up to the grass blades. Adult chinch bugs are black with white wings and a white triangle on their back while young chinch bugs are either reddish or black with red bands. TREAT THE PROBLEM.Once you have them you can either treat them with an insecticide or you can let them destroy your grass. They will not leave until there isn't any food, what we call grass, left! Fortunately for you there is an abundance of products at any hardware store or even most grocery stores with an outdoor section. I find insecticides containing either Bifenthrin or Imidacloprid to work fairly well on chinch bugs. WHAT IF I DON'T FIND CHINCH BUGS?If you start looking and you find some other little monster in your grass, the first step is still identification. Resist the urge to apply the first insecticide you see since you may end up killing beneficial insects and doing nothing to the ones damaging your yard. You can always look online, call out a professional lawn care company or try bagging the little bugger and bringing him to the hardware store. If you don't find any insects, you may want to check your irrigation coverage.
|

AuthorCharlie Casselberry Categories
All
Archives
April 2024
|
 RSS Feed
|
|
Contact |
Services |
About |
Locations
|
GreenSeasons
|
Baton Rouge Office
11628 S Choctaw Drive, Suite 227 Baton Rouge, Louisiana 70815 |
Greenwell Springs Office
14461 Frenchtown Road Greenwell Springs, LA 70739 |
Slidell Office
56010 Highway 433 Slidell, Louisiana 70461 |
© 2020 GreenSeasons